There's Magic Out There: Valentines Day
Showing posts with label Valentines Day. Show all posts

February 14, 2014

Love Monster Valentine Card Holder

This was my kiddos first Valentines day at school, so in honor of such a special occasion we made a special box together. We made a love Monster! 
We used a big empty cereal box, since we wanted to make sure that treats would fit inside we used a double bag cereal box. I then measured out the size of mouth I wanted using scrap paper. Then I cut into the box to make the mouth. 
I then used heavy stock paper to make the teeth. I measured against the mouth opening then glued it in from the inside. 
Then munchkin glued googly eyes to the face. Lots of them!  
Here is the face now
Then all around the back areas he covered it in hearts! 
Lastly I traced his hands and made some arms and glued the hand cut outs to the arms and box to create the monsters arms! Ta-da! Love Monster Box complete! 
Here is my munchkin modeling his new Valentines Day Card box holder! 
Hope you have fun making your own. Happy Valentines Day! 
Follow on Bloglovin

March 06, 2013

February Play and Learn 2013

In February we tried to go to Play and Learn more often but sadly we didn't get to. We did get lucky enough to be able to go the day before Valentines day and had lots of fun! That morning we woke up bright and Early making our way to our Beautiful Downtown San Antonio. 
Dont you love the Riverwalk in the morning?
We hopped on a trolley and got to The Central Library. 
February Play and learn was adorable! The theme was red (I like to think in honor of Valentines Day). Here is a glimpse of the fun we had:

I knew we were going to be able to make it so I wanted to make a quick treat for the rest of the kids there. The night before I had put a variety of candy in little treat bags and then I made a heart out of cardboard and used it as a pattern to make hearts out of construction paper. On the hearts I wrote Happy Valentines Day and on the back I wrote from my munchkin. I tied them with ribbon and ta-da! Treat bags done. It was cute to see munchkin give them out to the kiddos. 
The play and learn started off with a story and an Ice breaker (Ants in pants game). Munchkin loves it because they make it interactive for the kids. 
We then went off to do the various activities available. 
They had BIG books for the kids to look through and toys that matched that book to make it more interactive such as "Growing Vegetable Soup"  with all the veggie toys. And "The Very hungry caterpillar" along with a huge caterpillar and the foods he ate. It was so cute and even more fun!
They also set up what looked like a car wash except with hearts! They put the blue path so kids would walk on it but instead my munchkin used it as a food conveyor strip. 
We had a great time at the Library (Yes his shirt says Handsome little Devil) and picked up some fun books and even got to take home a Free Book "Baby eye like" for attending that day! How great is that? Its going to our home library! Have you been to your local library lately? Be sure to check out yours and have lots of fun! 

Want to see our other Play and Learn Visits? Here they are with themes:

Visit #1 Welcome!
Visit #2 Body parts, bones themed
Visit #3 Animal themed
Visit #4 Music themed
Visit #5 Halloween themed
Visit #6 Home themed
Visit #7 Dinosaur Day!
Visit #8 Building themed
Visit #9 The 5 senses themed
Visit #10 Under The Sea themed


Follow on Bloglovin

February 03, 2013

Project 52: Week 5

Project 52: Week 5

This week things felt like they were becoming normal again. We got back into our normal routine and Happiness seemed to come our way. The weather was so warm and sunny outside. We went to blow bubbles and stare at clouds.  
We went back to Play and Learn (which we missed so dearly). Plus, we got a little closer to Valentines Day! We made some Valentines cards that are super easy to make. Overall it was a great start to February!

How was your week? Are you ready for Valentines Day?
\
Follow on Bloglovin

January 28, 2013

Potato Heart Print Valentines

Here at the house we have been getting excited for Valentines Day. The house was feeling a little empty without all the decorations and tree so we started with some Valentines decorating and this weekend we made some easy to do Valentines Cards.

I don't know if you remember but we used potatoes to make Heart prints last year while learning about the Letter H and I wanted to use that idea to make Potato Heart Print Valentines!

Its super easy to do, you get a potato and cut into it to make a heart (I did one on each end), grab some paint and paper and have fun making some prints! This weekend was so sunny that we had to go outside and soak up the sunshine so I took out a table and our materials to do the prints outside.
After we made lots of hearts we let them dry and enjoyed being outside on such a beautiful winter day.

Later during the day I cut out a bunch of the hearts in various shades of red and got paper and a glue stick to decide where I wanted them to go. You can put them inside, outside, everywhere! They all look pretty, trust me and its fun for the munchkins to be sticking them everywhere.
I then took out my stamps and started making some messages on the cards. You can always use markers or crayons to write out a special message if you don't have stamps.
They will be a special Home made treat for your loved ones and they are super easy to do so. Hope you make some of your own and have fun while doing them!


Need some ideas on Valentines Decorations?
Check out the two DIY Valentines crafts I made this year here:

1. Valentines DIY Heart Wreath
2. Valentines DIY Heart Wall Decor

And dont forget to check out my Valentines Day Pinterest Board for lots of other fun ideas!


To make sure you dont miss out any new ones Follow me!

Hope you have a great Valentines day with your loved ones!


Follow on Bloglovin

January 12, 2013

DIY Heart Wall Decor

This past week I made two Valentines Crafts out of empty toilet paper rolls, the first was this one actually but I ended up posting the DIY Heart Wreath first. I am so in love with this Heart because it has been up on the wall the whole week and adds a great touch to the room.

Here's how you can make one for you:

Materials:

4 to 5 empty rolls of toilet paper to be on the safe side
paint with paintbrush
scissors
hot glue gun with glue
old newspaper to cover your work area

Directions:

Lay out your newspaper and decide how big of a heart you want to make. My first time making this I cut the toilet paper rolls first and made the design to see how it would look but now having done 2 of these I recommend you to please paint the toilet paper rolls first and let them dry. It is so much easier if you paint first!

After the paint is dry cut each toilet paper roll into 5 pieces as even as possible. Recreate the shape now and start hot gluing

Let the glue hold tight and admire your Heart! Hang it up to make a statement of love on your wall and ta-da! Valentines decor on your wall is done!


Check out my other Valentines craft I made this week here:
DIY Heart Wreath
Thanks for stopping by and hope you are having fun crafting and getting ready for Valentines day!
Follow on Bloglovin

January 08, 2013

Valentines Day DIY Hearts (Recycled Toilet paper roll crafts) Wreath

Just yesterday we finished picking up all the Christmas decorations and now there is about a month left until Valentines day! Yep, hard to believe it but Valentines Day is almost here and its a perfect reason to get the house out of the ordinary(boring right now that there's no decorations) to being in the Valentines Lovey dovey mood.

I wanted to make something with materials found at home so I used toilet paper rolls to create this special hanging decor.
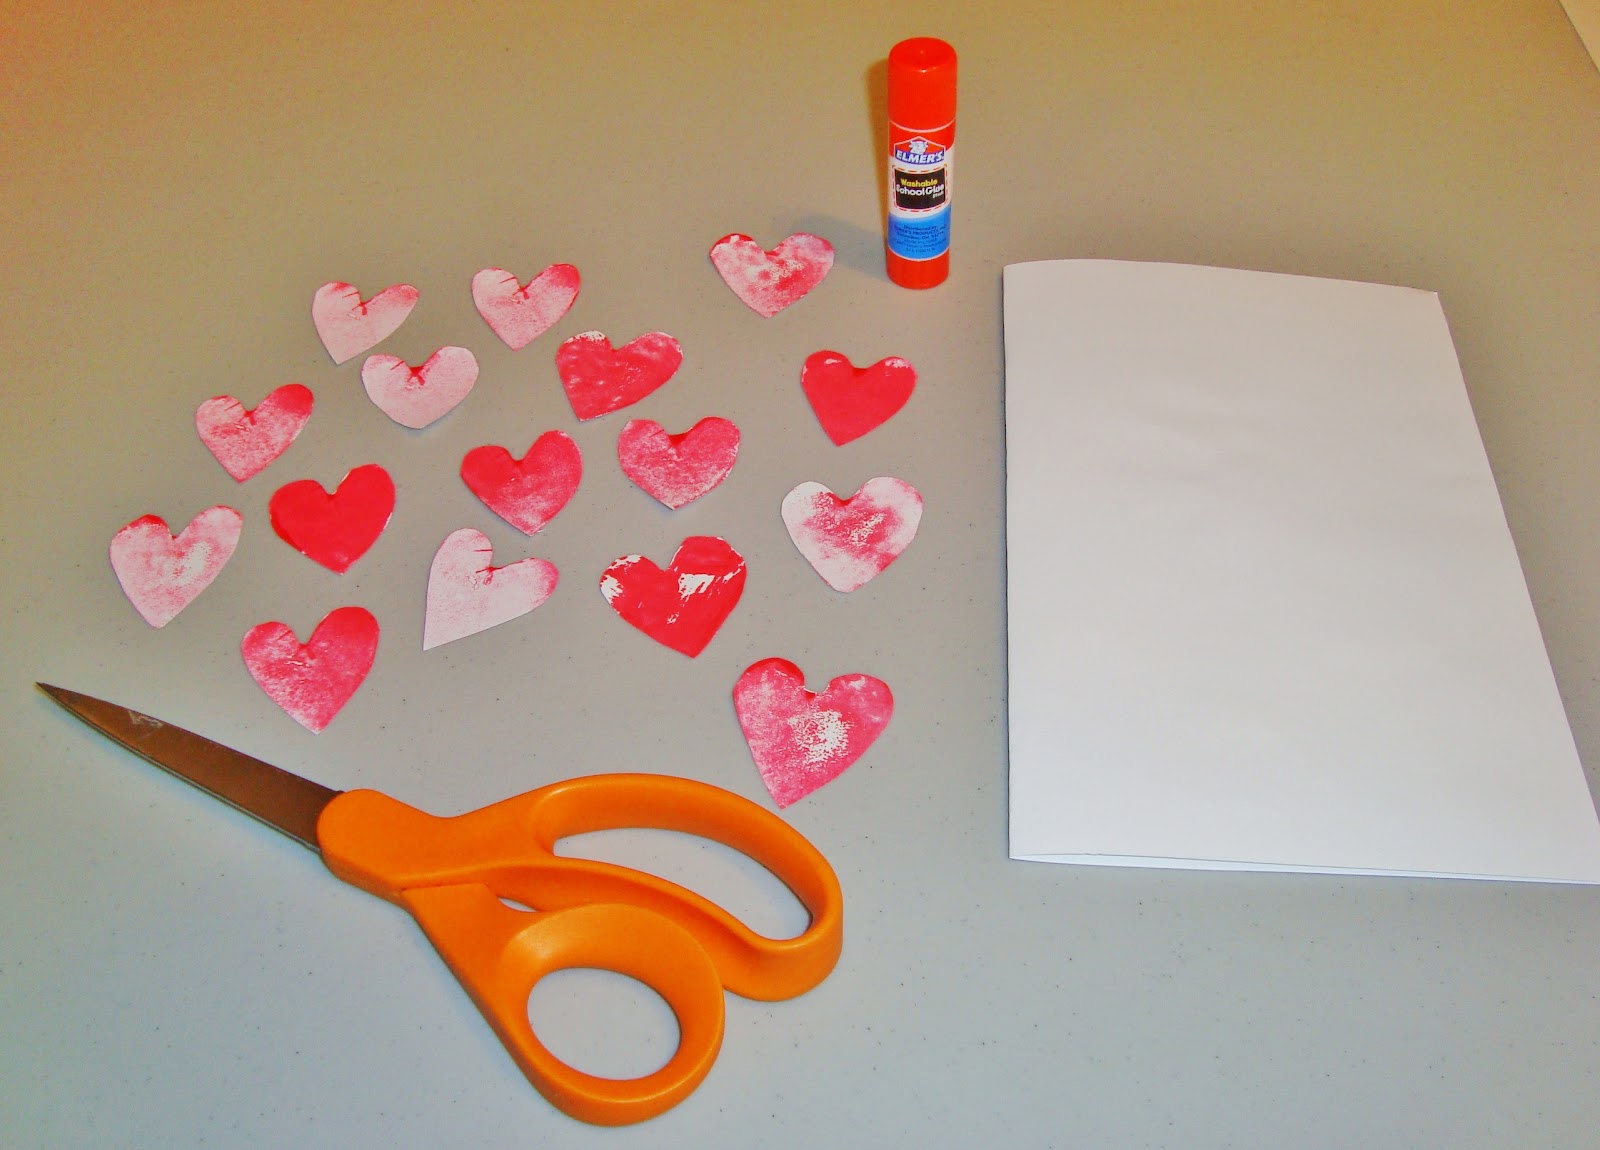
Materials:
  • Toilet paper rolls (5 to be on the safe size)
  • paint and paintbrush
  • scissors
  • colorful paper or plain white paper to color on
  • glue stick
  • glue gun with glue
  • newspaper to layout to cover your work area while painting
Directions:

Start by painting your toilet paper rolls inside and out so that the color you choose will be on evenly because if you do this after it is too hard to get in the creases (trust me) Put them off to your side to air dry. I drew on the newspaper my circle size I wanted so I could use it to estimate how many toilet paper rolls I would need to cut and to base my heart size off of so that when I did add the hearts it would be sized appropriately.
While the paint dried I used some scrap paper to freehand hearts in different sizes. I then cut out those hearts and traced the shape onto scrapbooking paper I had (you could also use regular white paper and color the hearts in with markers/crayons and put cute words), cut and glued them onto cardboard to make it more sturdy. Then cut those out to use
When the paint was dry I cut the rolls into 5 pieces each as even as I could. I then laid them out to how my circle would fit. I then began gluing the toilet paper roll pieces end to end with my hot glue gun carefully holding them into place to bend them into the circular shape
After I had made my circle I let it rest to dry so as to not add weight to it too quickly. I then hot glued on my hearts and let it get sturdy. I hanged it up on my wall with simple thumb tacks in 3 locations to balance the weight.
I'm happy with the final product. I used things I had already available at home and I'm happy to use something as ordinary as a empty toilet paper roll and give it new life. Its always good to re-purpose things so I keep boxes and containers because at the end of the day its free crafting supplies and who doesn't love free?

Hope this got you in the Valentines mood! To check out another fun DIY Valentines craft head over to Mean baby to check out a DIY Valentines Day Banner ! This is a Blog circle so if you follow along blog to blog you will see links to other blogger fun DIY Valentines crafts.

Don't forget to check out My Valentines Day Pinterest board for more Inspiration! 

Check out my other Valentines Day Heart Decor 
Happy Crafting!  
Follow on Bloglovin